There are two options you could use to house the pages for
your walk book.
1. RING BINDER
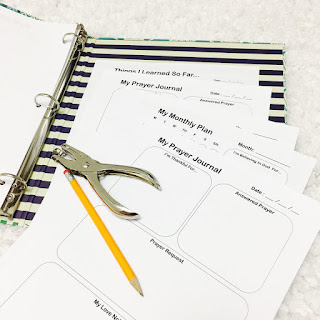
2. DISC BOUND SYSTEM
1. RING BINDER

2. DISC BOUND SYSTEM

Today, I will show you step by step on how to do it:
STEP ONE : Print out the PDF File you downloaded from Etsy . For a
better quality, make sure that your printer settings is on best
quality selection. Any paper of your
preference will do. However, I recommend that you use a thicker kind of paper
for the ‘My Faith Expressions” page especially if you will be using mixed
media. You can also do back to back
printing but this takes a little bit of patience to do and you would
be needing a quality paper too, in my opinion. I have to tell you that I went the easy route , used what I already have and did
the one- side printing.
I would normally just print out one set initially and print
out additional pages after I set everything up.
STEP TWO: Decide on
what system you want to use and get your materials ready.
You can either use the Disc Bound System or The Ring Binder.
Ring Binder
For this you will need :
Ring Binder - I got this 3-ring Binder with a nice pretty design from Walmart for less than $4.00 It’s cute and it will work just as good.


2 Puncher - Use the single puncher if you don’t have the 3-hole puncher like I did.

Pencil for marking

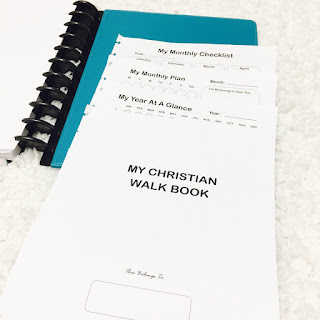
Disc Bound System
I personally use the TUL system which I got from Office Depot.
But you can use other brands as well ie. Arc by Staples, Create365 or the IQ360 carried by Walmart. The
cheapest route would be IQ360.
For this system, you will need the following :
1)
Discs - I first used the one inch ones but I
consistently do my devotionals so I used the 2 inches discs. A pack of 12 pieces costs
$4.50. For the letter size, you would need 11 discs.


2)
Cover Sheet-
You have several options for this.
a DIY Covers ( Front And Back)
·
Pretty Folder - You
can buy any folder you may like, cut in half and into letter size. You can add an extra space ( around half an
inch) since this would be your cover.
·
A laminated letter size sheets like this one.

·
Any thicker kind of paper. (Add half an inch as well : 11.5 x 9 )
·
Plastic Cover – A repurposed plastic folder will
do.
b A Ready-Made Cover - I figured that since I will be using this
system for a really long time, I invested on a
sturdy cover. I bought the TUL leather cover notebook, disassembled it, removed the
pages it came with and replaced the discs.

3)
Puncher
Disc Puncher
- This one I bought for almost $35. It’s easy and convenient to use.

b Single Puncher
- You can use this r too if you are on a budget but still wants to use the
disc system. Punch holes on where the
discs would go and cut slits on each hole.
I have to warn you though, using a single punch is a tedious (and I
should say, a messy) process. I gave up on it and just got me the TUL disc punch
for the convenience.
Note:
When I first used the single puncher, I bought the plastic dividers for
the TUL system and used it as a guide to know where to punch holes. This way, I
didn’t have to estimate on where the discs would go and everything will be in
perfect alignment.
STEP 3: Start Punching.
Here's the step by step process on how to punch holes using a single puncher:
Align the paper with the Ring Binder and using your pencil, mark the places where you will punch holes at.


You can use the first page or another paper as a template for punching the rest of the pages.


Repeat above for the rest of the pages.
STEP 4: Arrange
all the pages however you please and depending how you will use it.
STEP 5 : Assemble it.
For the RING BINDER, insert the pages on the ring binder and
you are all set!

Here is how you assemble the DISC BOUND SYSTEM:
Lay the front and back covers side by side and get your discs.


Begin to insert the discs one by one from top to bottom:


Now insert your pages , a few pages at a time.


Add pages as you please and now you are
set!

I hope you find this tutorial helpful.
Please visit my Etsy shop for the pages you
want to incorporate on your very own (My) Christian Walk Book: www.mychristianwalkbook.etsy.com
.
Thank You!
No comments:
Post a Comment